Foxmail怎么设置?Foxmail基本设置
Foxmail邮箱还有很多人都没有使用过,特别是客户端版的,即使使用过的用户也有很多是用网页版,今天这篇就借助Foxmail7.1的版本来给大家介绍Foxmail的设置,尽管每个版本有点不同,但是基本设置还是大同小异的。
Foxmail邮箱还有很多人都没有使用过,特别是客户端版的,即使使用过的用户也有很多是用网页版,今天这篇就借助Foxmail7.1的版本来给大家介绍Foxmail的设置,尽管每个版本有点不同,但是基本设置还是大同小异的。
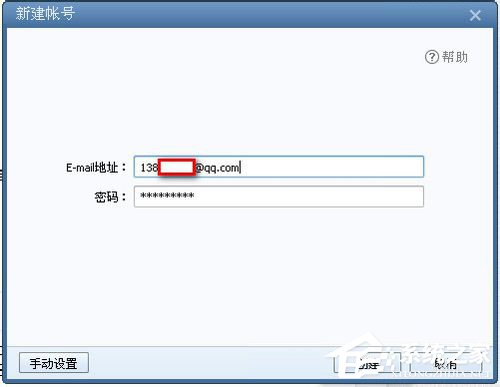
1、下载安装Foxmail邮箱客户端,然后双击运行Foxmail,刚下载的客户端会出现邮箱设置向导,我们在这里可以填上自己的邮箱和邮箱密码,大部份通用,比如QQ邮箱,新浪,搜狐等邮箱,直接填完邮箱地址和密码后就可以点创建了。
2、但是如果是企业邮箱的话,邮箱服务器有指定,端口有指定的话,你就要点左侧的“手动设置”了。

3、进入“手动设置”界面后,在“接收服务器类型”里可以选择POP3或IMAP,或是EXCHANGE。一般POP3,IMAP居多,选择正确的。

4、邮箱和密码不需要更改,如果你的imap和SMTP服务器有指定的请在此修改,端口号也可以修改。
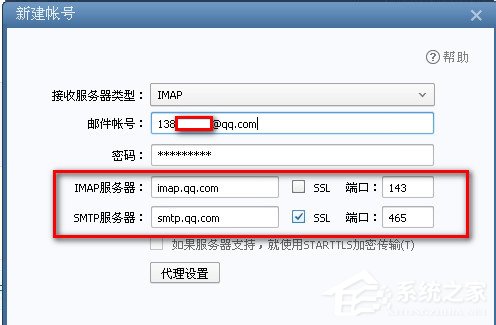
5、如果你是通过代理上网可以现在点“代理设置”填写好你的代理服务器。当然你也可以设置好后,进FOXMAIL界面在系统设置里再修改。

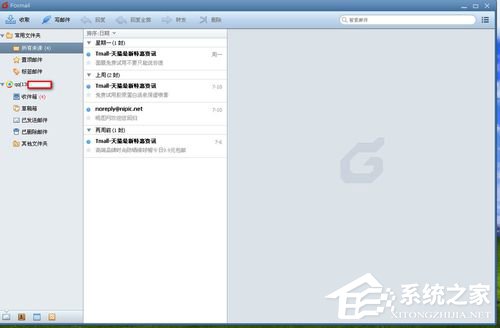
6、都设置好后,我们点创建,提示邮箱创建成功。

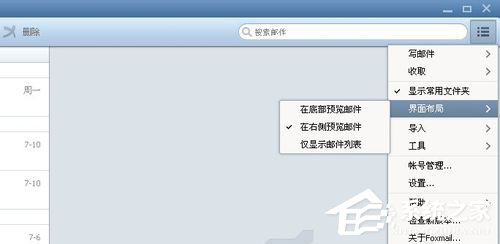
7、现在我们就能利用FOXMAIL进行邮箱的收发和撰写了,使用比以前的版本更简单,有些MAC的风格。邮箱的进一步设置可以点右上角的按钮,如图。大家学会了吗?
以上便是Foxmail7.1的基本设置,如果是普通个人用户登录只需要输入正确的账号密码即可,企业用户会稍微麻烦点,不过只要不卸载客户端那么就只需要设置一次即可。